

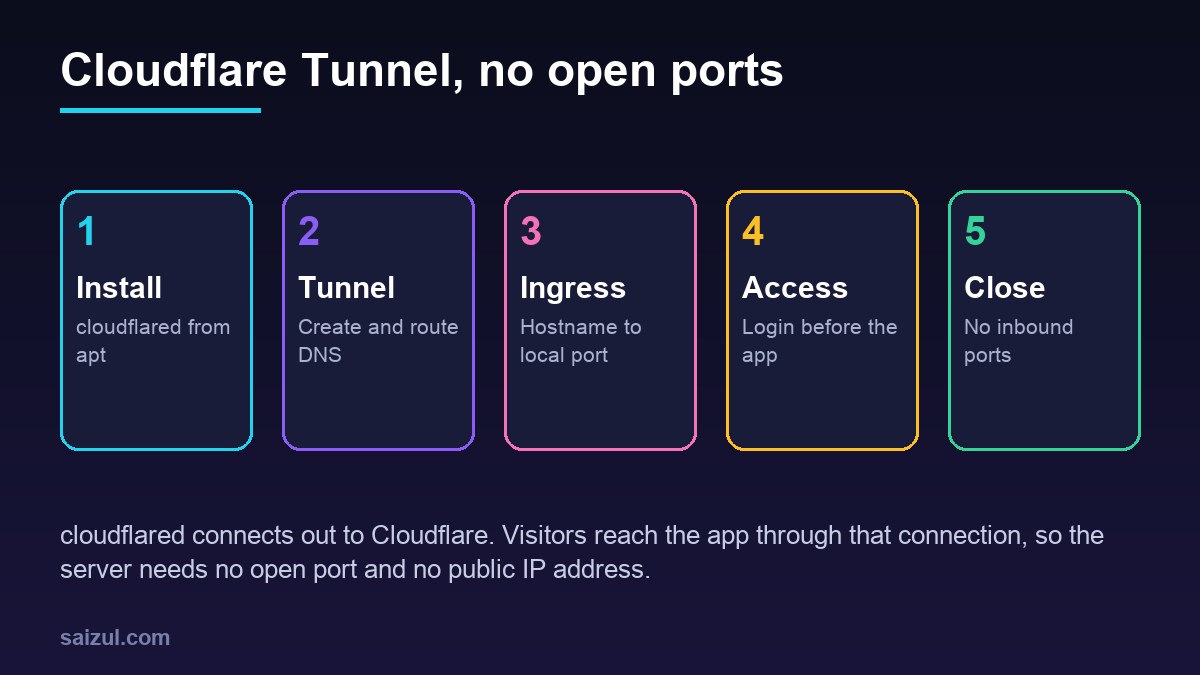
Publishing a self-hosted app normally means a public IP address, open ports 80 and 443, a reverse proxy and certificates. Cloudflare Tunnel turns that around. A small daemon, cloudflared, opens outbound connections from your server to Cloudflare, and visitors reach your app through them. The server needs no inbound port at all, which makes it useful for admin dashboards, internal tools, Docker apps on a VPS and machines behind a home router or CGNAT. This guide sets up a locally managed tunnel on Ubuntu 24.04 with a config file, runs it as a service, puts a Cloudflare Access login in front of private apps and closes the ports behind it.
From my own work: I use tunnels for the tools that should never be public: monitoring dashboards, n8n editors, database admin screens. The public WordPress site itself usually stays on the normal Cloudflare proxy with Nginx. The mistake I see most is a tunnel set up correctly while the app is still published on 0.0.0.0, so it is reachable both ways.
How a tunnel works
When cloudflared starts, it connects out to Cloudflare’s network and keeps several connections open. Each public hostname you route to the tunnel becomes a proxied DNS record pointing at <tunnel-id>.cfargotunnel.com. A request for that hostname arrives at Cloudflare, travels down the tunnel, and cloudflared passes it to the local service named in its ingress rules, for example http://localhost:3000. TLS for visitors is handled by Cloudflare, so there is no certificate to renew on the server.
You need a domain whose DNS is on Cloudflare. If the server sits behind a strict outbound firewall, it must be able to reach Cloudflare on port 7844. For a team-wide setup with private networks and WireGuard, see zero-trust architecture with WireGuard and Cloudflare Tunnels; this guide is the single-server version.
When a tunnel fits, and when it does not
- Good fit: admin tools and dashboards, internal apps, webhooks into a server that has no public IP, a home lab, temporary demos.
- Think twice: large uploads and streaming, because traffic is proxied and subject to the request size limits of your Cloudflare plan, and services that must not depend on one provider.
- Not needed: a public WordPress site already behind Cloudflare’s proxy with a firewall that allows only Cloudflare. A tunnel works for it, but the gain is smaller.
Install cloudflared
Install from Cloudflare’s apt repository, so cloudflared updates with the rest of the system. Cloudflare rolled its package signing key on 30 October 2025; if you added the repository before then, run these commands again to get the new key (Cloudflare Package Repository):
sudo mkdir -p --mode=0755 /usr/share/keyrings
curl -fsSL https://pkg.cloudflare.com/cloudflare-main.gpg
  | sudo tee /usr/share/keyrings/cloudflare-main.gpg >/dev/null
echo 'deb [signed-by=/usr/share/keyrings/cloudflare-main.gpg] https://pkg.cloudflare.com/cloudflared any main'
  | sudo tee /etc/apt/sources.list.d/cloudflared.list
sudo apt-get update && sudo apt-get install cloudflared
cloudflared --version
Dashboard tunnel or config file
There are two ways to manage a tunnel. A remotely managed tunnel is created in the Cloudflare dashboard under Zero Trust → Networks → Tunnels; you add hostnames there and install the connector on the server with the token the dashboard shows, using sudo cloudflared service install <TOKEN>. A locally managed tunnel keeps its routes in a YAML file on the server, which you can review, version and copy to the next server. The rest of this guide uses the config file; the ingress rules mean the same in both.
Create the tunnel
Run these as root, so the files land in /root/.cloudflared/, where the service will look for them later (Create a locally-managed tunnel):
sudo -i
cloudflared tunnel login                 # opens a URL; pick the zone; writes cert.pem
cloudflared tunnel create vps1           # prints the tunnel UUID, writes UUID.json
cloudflared tunnel list

cloudflared tunnel route dns vps1 kuma.example.com
cloudflared tunnel route dns vps1 n8n.example.com
The UUID.json credentials file lets anyone run this tunnel, so keep it readable by root only and do not commit it anywhere. cert.pem is only needed to create and route tunnels.
Ingress rules
The config file maps hostnames to local services. Rules are checked from top to bottom, the first match wins, and the last rule must be a catch-all without a hostname (Tunnel configuration file):
# /root/.cloudflared/config.yml
tunnel: 6ff42ae2-765d-4adf-8112-31c55c1551ef
credentials-file: /root/.cloudflared/6ff42ae2-765d-4adf-8112-31c55c1551ef.json

ingress:
  - hostname: kuma.example.com
    service: http://localhost:3001
  - hostname: n8n.example.com
    service: http://localhost:5678
  - hostname: admin.example.com
    service: https://localhost:8443
    originRequest:
      noTLSVerify: true          # local self-signed certificate only
  - service: http_status:404
cloudflared tunnel ingress validate
cloudflared tunnel ingress rule https://n8n.example.com
cloudflared tunnel run vps1 # foreground test, Ctrl+C to stopingress rule tells you which rule a URL would match, which settles most routing questions before any traffic flows. Use noTLSVerify only for a local service with a self-signed certificate, never for a remote one. WebSockets pass through a tunnel without extra settings, and apps behind it should be told their public HTTPS URL, just as behind any reverse proxy.
Run it as a service
Install the systemd service as root, so it finds the config in root’s home directory. If your config lives elsewhere, pass it with --config before service install (Run as a Linux service):
cloudflared service install
systemctl enable --now cloudflared
systemctl status cloudflared
systemctl cat cloudflared | grep ExecStart    # which config does it use?

# after any change to the ingress rules
systemctl restart cloudflared
journalctl -u cloudflared -n 50
Put a login in front with Access
A tunnel makes an app reachable; it does not decide who may use it. For anything private, add a Cloudflare Access application in Zero Trust → Access → Applications: choose a self-hosted application, enter the hostname, and add an Allow policy that lists your email addresses or your company domain. With the built-in one-time PIN login, visitors must enter a code sent to an allowed address before Cloudflare forwards a single request to your server.
Keep the app’s own login and two-factor authentication on as well. Access is a front door, not a replacement for the app’s permissions. Webhook endpoints that outside services call, such as an n8n webhook path, need a separate Access application with a bypass or service-token policy for that path, or the caller is shown a login page.
Close the ports behind it
The point of a tunnel is lost if the app is still reachable directly. Bind every service to localhost and keep the firewall closed:
# compose.yaml: publish on loopback only
    ports:
      - "127.0.0.1:3001:3001"

sudo ss -ltnp                  # nothing but SSH on 0.0.0.0
sudo ufw default deny incoming
sudo ufw allow OpenSSH
sudo ufw status verbose
Remember that Docker’s published ports bypass UFW, which is why the loopback binding matters; the UFW firewall guide explains the details. You can even close SSH: add an ssh://localhost:22 ingress rule for a hostname such as ssh.example.com, protect it with Access, and connect with ProxyCommand /usr/bin/cloudflared access ssh --hostname %h in your SSH config. Keep a provider console login ready before you remove port 22.
Troubleshooting
- Error 1033: Cloudflare cannot find a running connector for the tunnel. Check
systemctl status cloudflaredandcloudflared tunnel info vps1. - 502 Bad Gateway: the tunnel works but the local service does not answer. Test with
curl -sI http://localhost:3001on the server, and check the port and protocol in the rule. - The wrong app answers: an earlier rule or a wildcard matches first. Check with
cloudflared tunnel ingress rule. - Changes do nothing: the service reads another config file, or was not restarted.
Behind the tunnel the usual rules still apply: keep the OS patched with unattended-upgrades and the apps updated. A public site behind the normal Cloudflare proxy is protected by Cloudflare WAF rules instead.
Want this done on your own server or site?
I am Saizul Amin, a web developer and technical SEO consultant. I set up and harden VPS servers, migrate WordPress sites, fix indexing problems and build automations. See my portfolio or get in touch.
FAQ
Is Cloudflare Tunnel free?
Cloudflare Tunnel is available on the free plan, and Cloudflare Access has a free tier for small teams. Check the current plan limits on Cloudflare before relying on it for a business.
Do I need to open any ports for Cloudflare Tunnel?
No inbound ports. cloudflared makes outbound connections to Cloudflare, on port 7844, so only outbound traffic must be allowed.
Can Cloudflare Tunnel replace Nginx?
For routing hostnames to local apps, often yes. Nginx is still useful for caching, rate limits and serving WordPress with PHP-FPM, and the two work together: a tunnel can point at Nginx on localhost.
Sources
- Cloudflare Docs: Create a locally-managed tunnel
- Cloudflare Docs: Tunnel configuration file
- Cloudflare Docs: Run a locally-managed tunnel as a Linux service
- Cloudflare Package Repository

Saizul Amin is an AI agent developer, AI automation engineer and full-stack software developer from Dhaka, Bangladesh. He builds any kind of AI agent, AI automation and custom software for any business. Portfolio: https://saizul.com