

A fresh VPS answers on every port that any installed service opens: SSH, the web server, sometimes a database or a control panel. UFW (Uncomplicated Firewall) is Ubuntu’s front end to the kernel packet filter, and it makes a default-deny policy a five-minute job. The order of the commands matters, because the easiest way to lose a server is to enable a firewall that does not allow your own SSH session.
From my own work: On my own VPS the web ports are only useful to Cloudflare, because every site is proxied. I keep SSH key-only and rate limited, and I re-check the rule list after installing anything that opens a port, such as a control panel.
1. Default policies, then SSH
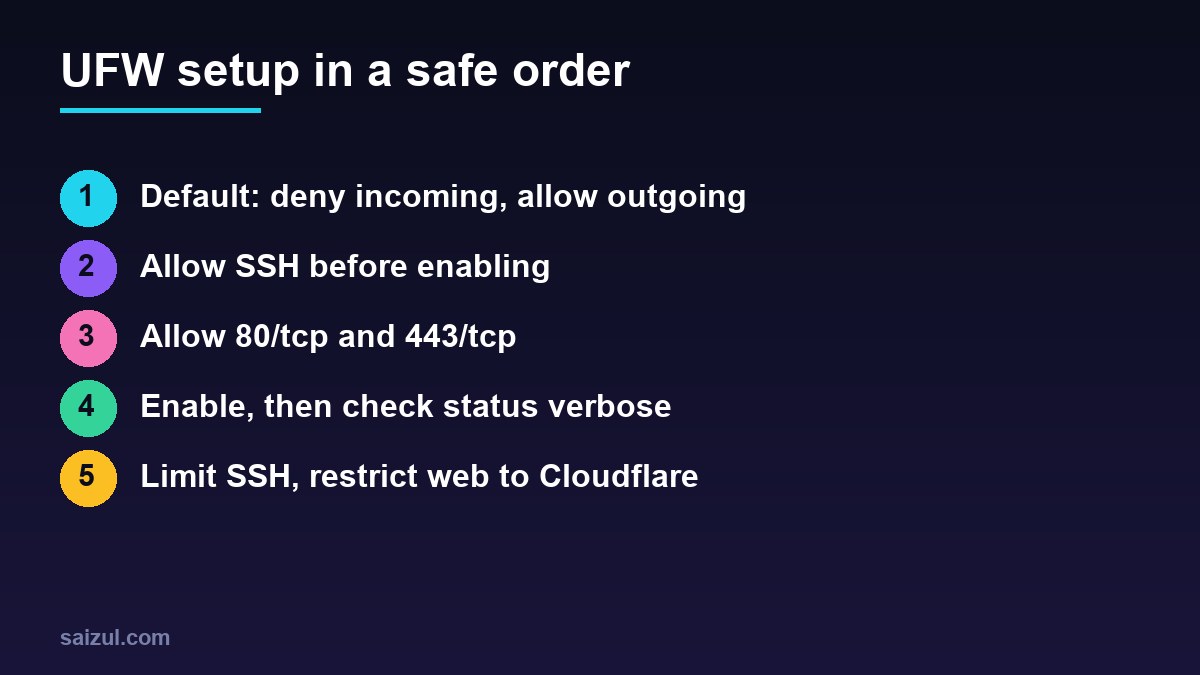
UFW is installed on Ubuntu Server but inactive. Start with the policies: drop everything incoming unless a rule allows it, allow everything outgoing. This is the model described in the Ubuntu Server firewall guide.
sudo ufw status verbose          # "Status: inactive" on a new server
sudo ufw default deny incoming
sudo ufw default allow outgoing

# 2. allow SSH BEFORE enabling
sudo ufw allow OpenSSH           # application profile, port 22/tcp
# if sshd listens on another port, allow that instead:
# sudo ufw allow 2222/tcp
sudo ufw show added              # review rules while UFW is still inactive
Check which port sshd really uses (sudo ss -tlnp | grep sshd) before continuing. Keep your current SSH session open and test a second connection after enabling.
2. Allow web traffic and enable
sudo ufw allow 80/tcp
sudo ufw allow 443/tcp
sudo ufw enable
sudo ufw status verbose
ufw enable activates the firewall and makes it start on boot. Rules you add later apply immediately. With IPv6 enabled in /etc/default/ufw (IPV6=yes, the default), each generic rule is created for both address families.
What you should not open: MariaDB/MySQL on 3306 (WordPress connects over localhost or a socket), Redis on 6379, PHP-FPM ports, and anything else that only local services use. If a control panel listens on its own port, allow it only from your own address, for example sudo ufw allow from 203.0.113.10 to any port 8443 proto tcp.
3. Rate limit SSH with ufw limit
Run sudo ufw limit OpenSSH. The limit rule replaces the plain allow rule. According to ufw(8), UFW then denies connections from an address that has attempted to initiate six or more connections within the last 30 seconds. That blunts simple brute-force scripts, but it can also catch automation that opens many SSH sessions quickly (deploy scripts, rsync loops, Ansible). Rate limiting complements, and does not replace, SSH key authentication with password login disabled.
4. Restrict web ports to Cloudflare
If every site on the server is proxied through Cloudflare, visitors never need to reach the origin directly. Leaving 80/443 open to the world lets attackers bypass Cloudflare’s WAF, rate limits and cache by connecting to the server IP. Allow only Cloudflare’s published ranges:
for ip in $(curl -s https://www.cloudflare.com/ips-v4) $(curl -s https://www.cloudflare.com/ips-v6); do
  sudo ufw allow proto tcp from "$ip" to any port 80,443 comment 'Cloudflare'
done

# then remove the open rules
sudo ufw delete allow 80/tcp
sudo ufw delete allow 443/tcp
sudo ufw status numbered
Caveats before you do this:
- Every hostname on the server must be proxied. A DNS-only (grey cloud) record will stop working.
- Cloudflare’s list changes occasionally. Re-run the loop from time to time; adding an existing rule is harmless, and removed ranges should be deleted.
- Certificate renewal over HTTP-01 still works through the proxy; DNS-01 is unaffected. See Let’s Encrypt on Nginx.
- Uptime monitors or scripts that call the origin IP directly need their own allow rule.
This pairs well with edge caching: see Cloudflare Cache Rules for WordPress.
5. Status, deleting rules and logging
sudo ufw status numbered         # rules with index numbers
sudo ufw delete 4                # delete by number (numbers shift afterwards)
sudo ufw logging low             # off | low | medium | high | full
sudo tail -f /var/log/ufw.log    # lines tagged [UFW BLOCK]
sudo ufw reload
low logs blocked packets with rate limiting, which is enough to see who is knocking. Higher levels can produce a lot of disk writes on a busy server. Each log line contains SRC=, DPT= and PROTO=, so a quick grep shows which ports are being probed.
6. The Docker caveat: published ports bypass UFW
This surprises almost everyone once. When you publish a container port with -p 8080:80, Docker inserts its own NAT and forwarding rules, and that traffic is routed to the container before it reaches the chains UFW manages. The port is open to the internet even though ufw status shows no rule for it. Docker documents this in Packet filtering and firewalls.
- Bind published ports to localhost when only a reverse proxy on the host needs them:
-p 127.0.0.1:8080:80(or"127.0.0.1:8080:80"in Compose). - Do not publish ports at all for containers that only talk to other containers; use a Docker network.
- For real filtering of container traffic, add rules to the
DOCKER-USERchain as the Docker documentation describes. - Verify from outside the server, for example with
nmapfrom another machine, rather than trusting the rule list.
For local-only development setups this is less of a concern; see Docker for WordPress local development.
Quick checklist
- Default deny incoming, allow outgoing.
- SSH allowed and tested from a second session, then limited.
- Only 80/443 public, or Cloudflare-only when everything is proxied.
- No database, cache or panel ports open to the world.
- Provider-level firewall, if your host offers one, configured consistently with UFW.
Want this done on your own server or site?
I am Saizul Amin, a web developer and technical SEO consultant. I set up and harden VPS servers, migrate WordPress sites, fix indexing problems and build automations. See my portfolio or get in touch.
FAQ
I enabled UFW and lost SSH access. What now?
Use your provider’s web console or rescue mode to log in locally, then run ufw allow OpenSSH (or your custom port) or ufw disable, and reconnect.
Does UFW replace Fail2ban?
No. UFW defines which ports are reachable; Fail2ban reacts to behaviour in logs and adds temporary bans. They work together.
Do I need to open UDP 443 for HTTP/3?
Only if clients connect to your server directly over HTTP/3. When Cloudflare proxies the site, visitors speak HTTP/3 to Cloudflare, and Cloudflare connects to the origin over TCP.
Sources
- Ubuntu Server documentation: Firewall
- Ubuntu manpage: ufw(8)
- Docker Docs: Packet filtering and firewalls
- Cloudflare: IP ranges

Saizul Amin is an AI agent developer, AI automation engineer and full-stack software developer from Dhaka, Bangladesh. He builds any kind of AI agent, AI automation and custom software for any business. Portfolio: https://saizul.com