

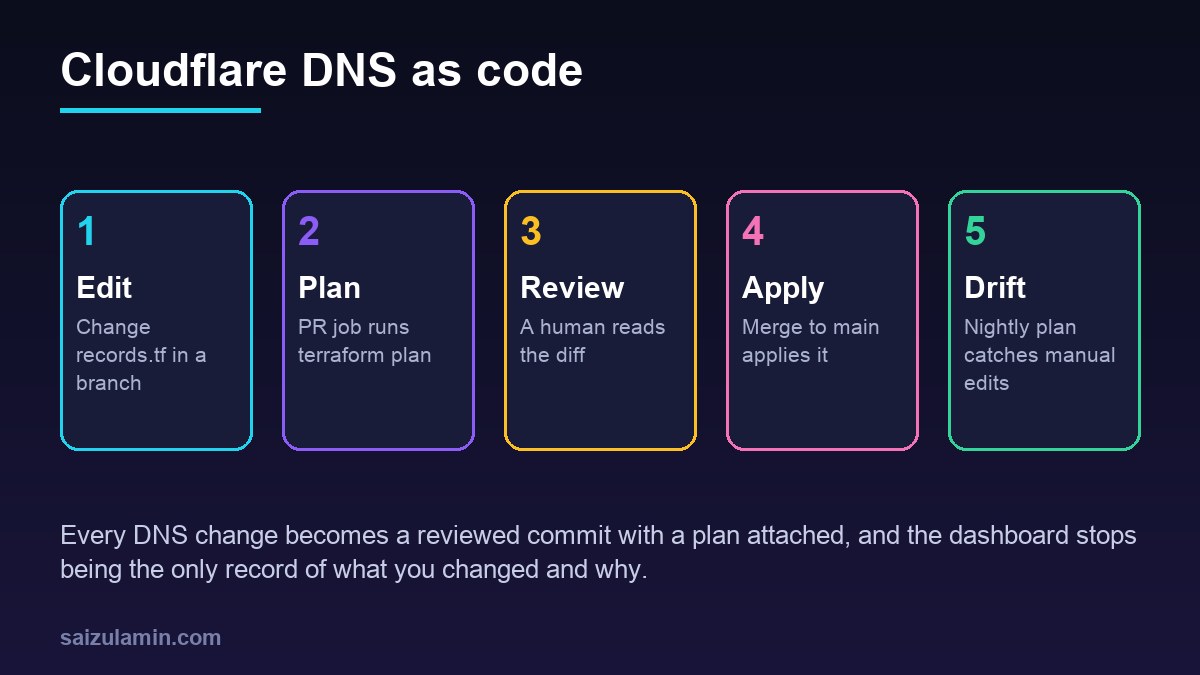
Managing Cloudflare DNS with Terraform turns every record change into a reviewed commit: you edit a file, a pull request shows the exact plan, and merging applies it. No more guessing who removed an MX record in the dashboard, and no more rebuilding a zone from memory. This guide sets it up end to end with Cloudflare provider v5: a zone-scoped API token, records defined as data, importing the records that already exist, remote state on Cloudflare R2, a GitHub Actions workflow that plans on pull requests and applies on merge, and a nightly drift check.
From my own work: I moved client zones to Terraform after one too many emergencies that started with someone tidying up old records in the dashboard. The first plan after importing was the most useful part: it exposed two records nobody could explain and a proxied record that should have been DNS-only for mail. Importing first and changing nothing until the plan was empty is what made the move boring, which is exactly what you want for DNS.
Why manage Cloudflare DNS with Terraform
| Approach | Good for | Weak spot |
|---|---|---|
| Dashboard edits | One-off changes on a small site | No review, history only in the audit log, easy to break mail |
| API scripts (curl) | Bulk updates, dynamic DNS | Scripts describe actions, not the desired end state |
| Terraform or OpenTofu | Many records, several zones, team changes | State file to protect, one more tool to learn |
Terraform compares the records you declare with what exists in Cloudflare and shows the difference before changing anything. That plan is what makes DNS changes reviewable. The same files work with OpenTofu if you prefer it; replace terraform with tofu in the commands.
Step 1: create a zone-scoped API token
In the Cloudflare dashboard, go to My Profile → API Tokens → Create Token and start from the Edit zone DNS template (Cloudflare: create an API token). Set the permission to Zone → DNS → Edit and the zone resources to only the zones this repository manages. Do not use the Global API Key. Optionally restrict the token by client IP if you run on self-hosted runners with a fixed address.
Copy the zone ID from the zone’s Overview page, then verify the token from your machine:
export CLOUDFLARE_API_TOKEN='paste-token-here'
export ZONE_ID='your-zone-id'

curl -s https://api.cloudflare.com/client/v4/user/tokens/verify
  -H "Authorization: Bearer $CLOUDFLARE_API_TOKEN" | jq '.result.status'
# "active"

curl -s "https://api.cloudflare.com/client/v4/zones/$ZONE_ID/dns_records?per_page=100"
  -H "Authorization: Bearer $CLOUDFLARE_API_TOKEN"
  | jq -r '.result[] | [.type, .name, .content, .proxied] | @tsv'
The second command lists the records you are about to bring under management. Save the output; you will compare it with the first plan.
Step 2: repository layout and provider v5
dns/
  versions.tf      # Terraform, provider and backend
  variables.tf
  records.tf       # the records, as data
  imports.tf       # temporary import blocks
.github/workflows/dns.yml
# dns/versions.tf
terraform {
required_version = ">= 1.6"
required_providers {
cloudflare = {
source = "cloudflare/cloudflare"
version = "~> 5.0"
}
}
# State in Cloudflare R2 (S3-compatible). Keys come from
# AWS_ACCESS_KEY_ID and AWS_SECRET_ACCESS_KEY in the environment.
backend "s3" {
bucket = "terraform-state"
key = "dns/example.com.tfstate"
region = "auto"
endpoints = { s3 = "https://YOUR_ACCOUNT_ID.r2.cloudflarestorage.com" }
skip_credentials_validation = true
skip_metadata_api_check = true
skip_region_validation = true
skip_requesting_account_id = true
skip_s3_checksum = true
use_path_style = true
}
}
provider "cloudflare" {
# reads CLOUDFLARE_API_TOKEN from the environment
}The backend settings follow Cloudflare’s own R2 example (Cloudflare: remote R2 backend). Create the bucket first and an R2 API token with object read and write on that bucket only. Back the state file up to a second location on a schedule, for example with the approach in the offsite backups with rclone guide, because a lost state file means re-importing everything. Keep the state private: it contains every record and its ID.
If you are upgrading from provider v4, the resource is now cloudflare_dns_record instead of cloudflare_record, the record value is content instead of value, and ttl is required. Upgrade in its own pull request, never mixed with record changes.
Step 3: declare records as data
One resource with for_each over a map keeps the file readable and gives each record a stable address. In v5, name, type, ttl and zone_id are required, ttl = 1 means automatic, and priority is required for MX records (provider docs: cloudflare_dns_record). Use full names (www.example.com), because that is how the API returns them, and a short name can show a change on every plan.
# dns/variables.tf
variable "zone_id" {
  type        = string
  description = "Cloudflare zone ID for example.com"
}
# dns/records.tf
locals {
records = {
apex_a = { name = "example.com", type = "A", content = "203.0.113.10", proxied = true }
apex_aaaa = { name = "example.com", type = "AAAA", content = "2001:db8::10", proxied = true }
www = { name = "www.example.com", type = "CNAME", content = "example.com", proxied = true }
# Mail: never proxied
mx_1 = { name = "example.com", type = "MX", content = "mx1.mailhost.example.net", priority = 10 }
mx_2 = { name = "example.com", type = "MX", content = "mx2.mailhost.example.net", priority = 20 }
spf = { name = "example.com", type = "TXT", content = ""v=spf1 include:_spf.mailhost.example.net -all"" }
dmarc = { name = "_dmarc.example.com", type = "TXT", content = ""v=DMARC1; p=quarantine; rua=mailto:dmarc@example.com"" }
}
}
resource "cloudflare_dns_record" "this" {
for_each = local.records
zone_id = var.zone_id
name = each.value.name
type = each.value.type
content = each.value.content
ttl = 1
proxied = try(each.value.proxied, false)
priority = try(each.value.priority, null)
comment = "Managed by Terraform: ${each.key}"
}Pass the zone ID with TF_VAR_zone_id in CI, or a non-secret terraform.tfvars file. For TXT records, match the exact form Cloudflare returns, quotes included, or every plan will want to rewrite them; the import step below shows you that form. To guard records whose loss would take mail down, add a lifecycle { prevent_destroy = true } block to a separate resource for them.
If any record names are new to you, the DNS records explained guide covers what each type does.
Step 4: import the records you already have
Never let the first apply create records that already exist. Import them, then change nothing until terraform plan reports no changes. Cloudflare’s cf-terraforming tool generates both the configuration and the import blocks for provider v5 (cf-terraforming):
brew tap cloudflare/cloudflare
brew install cloudflare/cloudflare/cf-terraforming

cd dns
terraform init

# HCL for every record in the zone (use it as a reference for records.tf)
cf-terraforming generate
  --resource-type cloudflare_dns_record
  --zone "$ZONE_ID" > generated.tf.txt

# import blocks (Terraform 1.5+) instead of CLI import commands
cf-terraforming import
  --resource-type cloudflare_dns_record
  --zone "$ZONE_ID"
  --modern-import-block > imports.generated.txt
The generated resources use one resource per record with generated names. You can keep them as they are, or move them into the for_each map and write the import blocks against the map keys. The import ID format is zone_id/record_id:
# dns/imports.tf  (delete after the first successful apply)
import {
  to = cloudflare_dns_record.this["apex_a"]
  id = "${var.zone_id}/0f1e2d3c4b5a69788796a5b4c3d2e1f0"
}

import {
  to = cloudflare_dns_record.this["mx_1"]
  id = "${var.zone_id}/a1b2c3d4e5f60718293a4b5c6d7e8f90"
}
# record IDs, ready to paste
curl -s "https://api.cloudflare.com/client/v4/zones/$ZONE_ID/dns_records?per_page=100"
-H "Authorization: Bearer $CLOUDFLARE_API_TOKEN"
| jq -r '.result[] | "(.id) (.type) (.name) (.content)"'
export TF_VAR_zone_id="$ZONE_ID"
terraform plan # goal: N to import, 0 to add, 0 to change, 0 to destroyWork through the plan until it shows only imports. A change means your declaration differs from reality: a missing comment, a TTL, quotes on a TXT value. Fix the code, not the zone. When the plan is clean, run terraform apply once to record the imports in state, delete imports.tf, and commit.
Step 5: GitHub Actions, plan on pull request and apply on merge
Add three repository secrets: CLOUDFLARE_API_TOKEN, R2_ACCESS_KEY_ID and R2_SECRET_ACCESS_KEY, plus a variable CF_ZONE_ID. Create an environment called production with required reviewers if you want a second approval before apply.
# .github/workflows/dns.yml
name: dns

on:
  pull_request:
    paths: ['dns/**']
  push:
    branches: [main]
    paths: ['dns/**']
  schedule:
    - cron: '17 3 * * *'   # nightly drift check
  workflow_dispatch:

permissions:
  contents: read

concurrency:
  group: dns-terraform      # never two runs against the same state
  cancel-in-progress: false

env:
  CLOUDFLARE_API_TOKEN: ${{ secrets.CLOUDFLARE_API_TOKEN }}
  AWS_ACCESS_KEY_ID: ${{ secrets.R2_ACCESS_KEY_ID }}
  AWS_SECRET_ACCESS_KEY: ${{ secrets.R2_SECRET_ACCESS_KEY }}
  TF_VAR_zone_id: ${{ vars.CF_ZONE_ID }}
  TF_IN_AUTOMATION: 'true'
  TF_INPUT: 'false'

defaults:
  run:
    working-directory: dns

jobs:
  plan:
    if: github.event_name != 'push'
    runs-on: ubuntu-latest
    steps:
      - uses: actions/checkout@v7
      - uses: hashicorp/setup-terraform@v4
        with:
          terraform_version: 1.17.2
          terraform_wrapper: false
      - run: terraform fmt -check -recursive
      - run: terraform init
      - run: terraform validate
      - id: plan
        run: |
          set +e
          terraform plan -detailed-exitcode -no-color > plan.txt
          code=$?
          set -e
          echo "exitcode=$code" >> "$GITHUB_OUTPUT"
          {
            echo '### Cloudflare DNS plan'
            echo '```'
            tail -c 60000 plan.txt
            echo '```'
          } >> "$GITHUB_STEP_SUMMARY"
          if [ "$code" -eq 1 ]; then exit 1; fi
      - name: Fail the nightly run on drift
        if: github.event_name == 'schedule' && steps.plan.outputs.exitcode == '2'
        run: |
          echo "::error::DNS drift: Cloudflare differs from the code in main"
          exit 1

  apply:
    if: github.event_name == 'push'
    runs-on: ubuntu-latest
    environment: production
    steps:
      - uses: actions/checkout@v7
      - uses: hashicorp/setup-terraform@v4
        with:
          terraform_version: 1.17.2
          terraform_wrapper: false
      - run: terraform init
      - run: terraform apply -auto-approve
How it behaves:
- Pull requests run format, validate and plan, and write the plan to the job summary for the reviewer.
-detailed-exitcodereturns 0 for no changes, 2 for changes and 1 for errors, so only real errors fail the check. - Merges to main apply, after the
productionenvironment approval if you set one. The apply re-plans against the current state, so a change merged after yours cannot be silently overwritten by an old plan. - The nightly run fails when someone changed DNS in the dashboard. Either copy the change into code or revert it with a normal apply.
- Forks: secrets are not passed to workflows from forked pull requests, so plans run only for branches in the repository. That is the safe default for a token that can edit DNS.
The same pull request habits used in the WordPress deploy with GitHub Actions guide apply here: small changes, one purpose per pull request, and the plan read before approval.
Making DNS changes safely
- Lower TTL first for records you will move to a new server, in a separate change a day earlier, if they are DNS-only. Proxied records are answered by Cloudflare, so their TTL is not what clients cache.
- Read destroy lines carefully. Renaming a map key looks like a destroy and a create. Use a
movedblock to rename without touching the record. - Keep mail records unproxied. MX targets and mail hostnames must point to the real mail server.
- Check after apply with
dig +short example.com MX @1.1.1.1and, for proxied records, a request through the site.
# rename a key without recreating the record
moved {
  from = cloudflare_dns_record.this["www"]
  to   = cloudflare_dns_record.this["www_cname"]
}
Once DNS is code, other Cloudflare settings can follow the same path, such as the rules described in the Cloudflare WAF rules for WordPress guide and the Cloudflare cache rules guide. Move them one product at a time, importing first each time.
Cloudflare DNS with Terraform checklist
- API token limited to DNS Edit on the managed zones only.
- Provider pinned to
~> 5.0and Terraform version pinned in CI. - Remote state on R2 with a private bucket and a backup.
- All existing records imported and the first plan empty before any change.
- Plans on pull requests, apply on merge with optional approval, one run at a time.
- A nightly plan that fails on drift.
Want this done on your own server or site?
I am Saizul Amin, a web developer and technical SEO consultant. I set up and harden VPS servers, migrate WordPress sites, fix indexing problems and build automations. See my portfolio or get in touch.
FAQ
Can Terraform manage existing Cloudflare DNS records?
Yes. Import them first, with import blocks or the cf-terraforming tool, and adjust your code until terraform plan shows no changes. Only then start editing records through code.
What changed in Cloudflare Terraform provider v5 for DNS?
The resource is cloudflare_dns_record instead of cloudflare_record, the record value is set with content, and ttl is required, with 1 meaning automatic. Upgrade in its own pull request and check the plan carefully.
What permissions does the Cloudflare API token need?
For DNS only, a token with Zone DNS Edit permission, limited to the zones the repository manages, is enough. Avoid the Global API Key.
Where should I store Terraform state for Cloudflare?
In a remote backend that the CI job and your team can reach, such as a private Cloudflare R2 bucket through the S3 backend. Back it up, because losing it means importing every record again.
How do I detect manual DNS changes made in the dashboard?
Run terraform plan with -detailed-exitcode on a schedule. Exit code 2 means the live zone differs from the code, and the job can fail to alert you.
Sources
- Cloudflare Terraform provider: cloudflare_dns_record
- Cloudflare Docs: Remote R2 backend for Terraform
- Cloudflare Docs: Create an API token
- cf-terraforming on GitHub
- Terraform Docs: S3 backend

Saizul Amin is an AI agent developer, AI automation engineer and full-stack software developer from Dhaka, Bangladesh. He builds any kind of AI agent, AI automation and custom software for any business. Portfolio: https://saizul.com